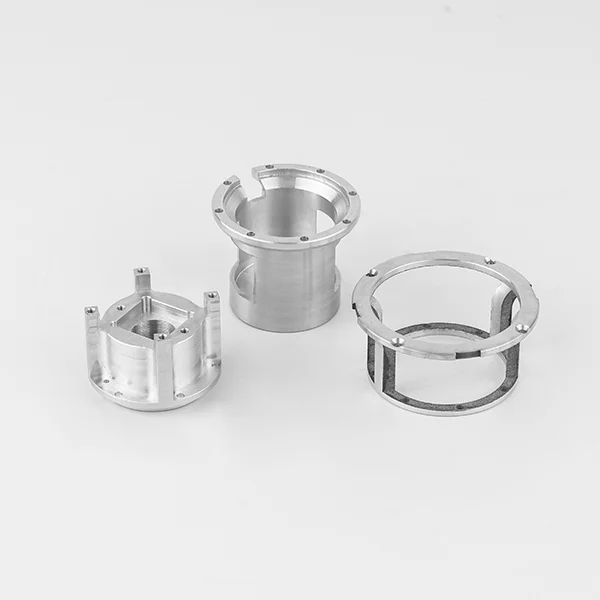
In the domain of modern manufacturing, precision and accuracy are not just desirable—they are essential. This is particularly true in industries such as aerospace, medical devices, optics, and automotive engineering, where even microscopic deviations can lead to system failures or compromised safety. High Precision CNC (Computer Numerical Control) machining enables the fabrication of complex components with exacting tolerances, often down to the micrometer scale. However, the precision of the machining process must be validated through rigorous and systematic quality inspection protocols. In this blog post, Okin, a high performance precision parts manufacturing factory, will share the quality inspection of high precision CNC machining parts.
Importance of Quality Inspection in High Precision CNC Machining
Quality inspection ensures that each machined part conforms precisely to its design specifications. These specifications may include dimensional tolerances, surface finish, concentricity, flatness, straightness, roundness, and geometric tolerances such as GD\&T (Geometric Dimensioning and Tolerancing) symbols. The objectives of quality inspection are:
* Validation: Verifying that parts meet engineering drawings and 3D CAD models.
* Process Control: Providing feedback to adjust machining parameters and prevent defect propagation.
* Compliance: Ensuring adherence to international standards such as ISO 9001, AS9100, or ISO 13485.
* Traceability: Maintaining documentation for audit and lifecycle management.
High precision parts often operate in safety-critical or performance-intensive environments, necessitating a zero-defect approach in both manufacturing and inspection.
Inspection Methods for CNC Machined Parts
There are several inspection techniques, broadly categorized into contact and non-contact methods, that are used based on part geometry, tolerance requirements, and production volume.
1. Coordinate Measuring Machines (CMMs)
CMMs are the gold standard for precision dimensional inspection. They use a probing system—either tactile or optical—to map the surface of a part against its CAD model.
* Bridge CMMs are common for high-precision applications, offering accuracy in the range of ±1-2 µm.
* Scanning Probes collect thousands of data points across complex surfaces for profile or form analysis.
* Touch-Trigger Probes are used for simple point-to-point measurements such as hole diameters and feature locations.
Modern CMMs integrate with software like PC-DMIS or Zeiss Calypso to generate automatic reports and statistical process control (SPC) charts.
2. Optical and Laser Scanning
Optical inspection systems, such as laser scanners and structured light scanners, provide fast and non-contact measurement solutions.
* Laser Scanning: Offers rapid point cloud generation for free-form and organic shapes. Ideal for parts with complex geometries not easily measured with probes.
* Structured Light Scanning: Projects patterns onto surfaces and uses camera triangulation to reconstruct 3D geometries.
* Accuracy: Typically within ±10 µm, making them suitable for most high-precision parts.
These systems are particularly beneficial in reverse engineering and first-article inspection (FAI).

3. Surface Roughness Measurement
Surface finish is critical in applications like sealing surfaces, fluid flow channels, or optical components.
* Contact Profilometers: Drag a stylus over the surface to measure roughness (Ra, Rz).
* Non-contact Profilometers: Use white light interferometry or confocal microscopy for nano-scale resolution.
Standards such as ISO 4287 and ASME B46.1 define surface texture metrics and testing procedures.
4. Air Gauging
Air gauges are used for ultra-precise internal dimension checks such as bore diameters.
* They offer non-contact measurement using the back pressure created when compressed air escapes through a nozzle.
* Tolerances of ±0.5 µm are achievable, making them suitable for tight bore and shaft inspections.
Air gauging is fast and ideal for in-line inspection on high-volume production runs.
5. Go/No-Go Gauges
For rapid verification of basic dimensions, Go/No-Go gauges provide a simple yet effective inspection method.
* Common for shaft diameters, thread sizes, and pin gauges.
* While not providing detailed metrics, they quickly assess whether a part is within tolerance limits.
These tools are typically used in tandem with more quantitative inspection methods.
Metrology Standards and Calibration
Precision inspection requires a rigorous metrology framework to ensure accuracy and repeatability. Key aspects include:
* Traceability to National Standards (e.g., NIST, NPL): Instruments must be calibrated against traceable reference artifacts.
* Environmental Control: Inspection rooms are maintained at 20°C ±1°C, with strict control of humidity and vibration.
* Gage R\&R Studies: Gauge Repeatability and Reproducibility studies ensure that measurement variability is minimal compared to part tolerances.
Periodic calibration schedules, defined by ISO/IEC 17025, ensure long-term reliability of measurement systems.
Statistical Quality Control (SQC) and Process Capability
In high-precision CNC machining, statistical methods help monitor and optimize process stability.
* Control Charts: Track key dimensions across batches to detect trends or shifts.
* Cp and Cpk Values: Evaluate process capability and conformance to tolerance limits. A Cpk > 1.33 is generally considered acceptable in high precision environments.
* Six Sigma Methodologies: Applied to reduce variation and improve overall quality levels.
SPC software tools often interface directly with CMMs and other devices to enable real-time quality tracking.
In-Process vs. Final Inspection
* In-Process Inspection: Performed during machining using on-machine probing or optical systems. Enables real-time corrections.
* Final Inspection: Conducted in a dedicated metrology lab for complete verification before part delivery.
Both approaches are essential. In-process inspection minimizes scrap and rework, while final inspection ensures compliance and certification.
Conclusion
Quality inspection of high precision CNC machining parts is a cornerstone of advanced manufacturing. It bridges the gap between design intent and real-world functionality, ensuring that every micron counts. By employing a combination of tactile, optical, and statistical methods—anchored in globally recognized standards—manufacturers can guarantee the dimensional integrity and performance reliability of complex components. As tolerances tighten and industries demand higher accountability, robust inspection strategies will remain critical for innovation and excellence in CNC machining.
www.okinmachining.com
Okin
